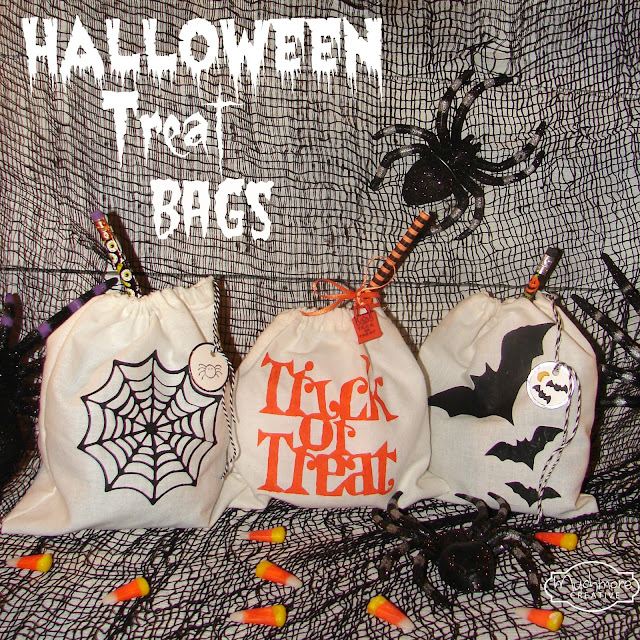
What you will need:
Muslin material
Stencil
Paint
Sewing Machine with thread & scissors
Baker's Twin, yarn, or ribbon for the drawstring
First thing I did was cut a couple vinyl Halloween stencils with my Cricut and used transfer tape to stick them to the Muslin fabric. You don't need a Cricut, you could use any stencil you have.
Next, I painted the stencils using acrylic paint mixed with a textile medium. (The textile medium helps when painting on fabric)
After the paint was dry, I peeled up the vinyl stencil.
This is what it looked like after:
Then I trimmed the fabric to the size that I wanted the bag to be. I trimmed mine to 7 1/2 inches wide by 17 inches long. When the fabric is folded in half it makes a bag that's 7 1/2 inches by 8 1/2 inches.
Next, I folded one end of the fabric over about 1/2 inch (toward the center of the bag) and pressed with an iron. Then, I folded it over 1/2 inch again and pressed - this forms the casing for the drawstring. Repeat on the other end of the fabric.
Then, I sewed along the bottom of the casing on the wrong side of the fabric. I used the inside of my pressure foot as a guide. Make sure to sew each casing separately. Don't forget to back stitch!
Next, I sewed the side seams with the right sides of the fabric together - remembering to stop right before the casing so not to sew it closed.
This is what is looks like after it is sewn.
Then, I used a safety pin to pull the baker's twin through the casing to make the drawstring.
Lastly, fill the bags with whatever fun things you like!
Thanks so much for stopping by!

Be sure to check out these fun link up parties!
Share Your Cup


Hi Brenda,
ReplyDeleteWow you made the cutest Halloween treat bags!
I hope you will share this at our blog party this week.
Enjoy your day and thanks for sharing this craft.
Julie xo
these are so super cute, love the spider web feature, adds that spooky touch with fun as well
ReplyDeletecome see us at http://shopannies.blogspot.com
Brenda, these bags are awesome! I think I will make some with my girls but with my spray varnish trick to transfer images which is faster... I'm so impatient! I would love if you can share them with us this week as well at http://sweethings.net/oh-my-heartsie-girls-wordless-wednesday-2/
ReplyDeleteHave a wonderful week!
Hugs,
Pili
This are awesome! I bet they would be cool with some glow in the dark paint, too!
ReplyDeleteOh gosh, I love this! So cute!
ReplyDeleteThanks for joining Cooking and Crafting with J & J!
You should sell them on Etsy. What lovely and adorable bags!!! Kudos.
ReplyDeletewww.philandmama.com
Oh my goodness... I saw these adorable treat bags on Pinterest and had to come see who made them! Adorable!!!
ReplyDeleteHow cute, I just love these!
ReplyDeleteLove these! For the non-sewers you could also just buy pre-made bags to use the awesome stencil design, too!
ReplyDeleteHello Brenda, I'm happy to let you know that your treat bags are being featured at our Monday Cooking and Crafting with J & J Link Up tomorrow. Thanks for sharing your awesome projects with us. We hope you will join us again!
ReplyDeleteJulie at Julie's Lifestyle
These are so creative and just perfect!!! Thank you so much for sharing on MMM! See you next party! :-)
ReplyDeleteCathy@threekidsandafish{dot}com
Very cute.. thank you for sharing at Share it One More Time
ReplyDeleteThese are adorable. Nice job :) Thanks for linking up to the Home Matters Party with you! #HomeMattersParty Hope to see you next week. http://lauraslittlehousetips.com/home-matters-linky-party-59/
ReplyDeleteThese are adorable Brenda!
ReplyDeleteYour kids are going to love these cute treat bags. Love the stencils you chose! Thanks for sharing with SYC.
ReplyDeletehugs,
Jann
These are so much fun and have so many possibilities. Featuring when my link party opens up tonight !
ReplyDeleteyou are one creative mom indeed..I envy you :). I want to have those bags too..
ReplyDelete