Sunday, August 30, 2015

Wedding Banner

It is still summer, which is wedding season!


Wedding Bunting


My friend's daughter was getting married and asked me to make a bunting for her reception.  So I wanted to do a tutorial on how to make the bunting.


What you will need:
Felt
Fabric
Scrapbook paper
Banner pattern - enlarged and reduced so you have 3 different sizes
Material for letters if they are vinyl, printed or stenciled
Jute, yarn, or string
Hot glue
Double sided tape
Scissors

First I made the patterns, then used the largest one to cut out the felt pieces.


When cutting the felt piece, make sure to add about an inch to the end so you will be able to fold it over the string or whatever you are hanging it up with.


Next, use the next medium sized pattern and cut out the next layer.  I used a denim paper for mine, but fabric works just as well.


Then use the smallest pattern and cut out your last layer.  I used a fabric paper, but again, fabric would work just as well.


Next, fasten the layers together.  Hot glue works well on fabric, double sided tape works well on paper.  I found that glue was visible through the white fabric paper, so I used tape instead.


The add the letter on the top layer.  You can either buy or cut a vinyl letter, stencil a letter on the top layer, or print out a letter on the paper before you cut it.


Finally, turn the pieces over and glue the felt over the string, jute or yarn.


I made this one blue to match the wedding colors.

Just Married Bunting

I also made a welcome bunting using the same technique.

Welcome Bunting

What type of bunting would you make?


Thanks for stopping by!
post signature
Be sure to check out these fun link up parties!

Mad Skills
Tutorial & Tips Link Party
Lou Lou Girls Fabulous Party
Inspire Me Monday
Show & Tell Party
Create, Link, Inspire
Creative Muster
Share Your Cup
The WednesdayRound Up
Work It Wednesday
Lovely Little Link Party
Celebrate It Block Party
Flaunt It Friday
Link Party Palooza
Much Ado About Monday

Saturday, August 22, 2015

Cabinet Door Corkboard

I have seen lots of different cork boards around, and decided I needed to make one.


I have fraternal twin sons that had a school family history project that they needed to do some research for, so we decided to trace back twins in the family.  Both my parents are twins.  My mother is an identical twin and my father has a fraternal twin brother.  We found out that there are quite a few sets of twins on my mothers side going back several generations!  My mom was nice enough to give me a copy of a few of the sets of twins.  It was a fun project.  The corkboard made a perfect way to display the pictures!

What you will need:
Cabinet Door
Paint
Sandpaper
Faux Glaze
Wood Glue
Wood Applique
Chalkboard MDF


First glue the wood applique on the cabinet door.
Corkboard


I usually paint on a layer of acrylic paint before I use spray paint.  If I don't, I usually end up using a lot more spray paint.

Next, coat the frame with spray paint.


After the paint has dried, lightly sand the frame to rough it up a bit.


I like to use a faux glaze that I have tinted with some brown acrylic paint.  I usually apply it to the areas I have sanded and a bit here and there  - I wipe it off rather quickly with a rag so it doesn't give it a smeared look.  If you want more of an antiqued look you could use the tinted faux glaze all over the frame.


I decided that I wanted to paint the cork a gray color to go with some other decor in the house


My great hubby was nice enough to use his air nailer and nail the cork and backing in to the cabinet door frame!


What do you have on your cork board?

Thanks so much for stopping by!

post signature
Be sure to check out these fun link up parties!
Found & Foraged Link Party
Mad Skills
Sunday Showcase
Inspire Me Monday
Show & Tell Link Party
Lou Lou Girls Fabulous Party
Tutorials & Tips Link Party
Create, Link, Inspire
Creative Muster
The Wednesday Round Up
Share Your Cup
Work It Wednesday
Celebrate It Block Party
Lovely Little Link Party
Flaunt it Friday
Link Party Palooza

Saturday, August 15, 2015

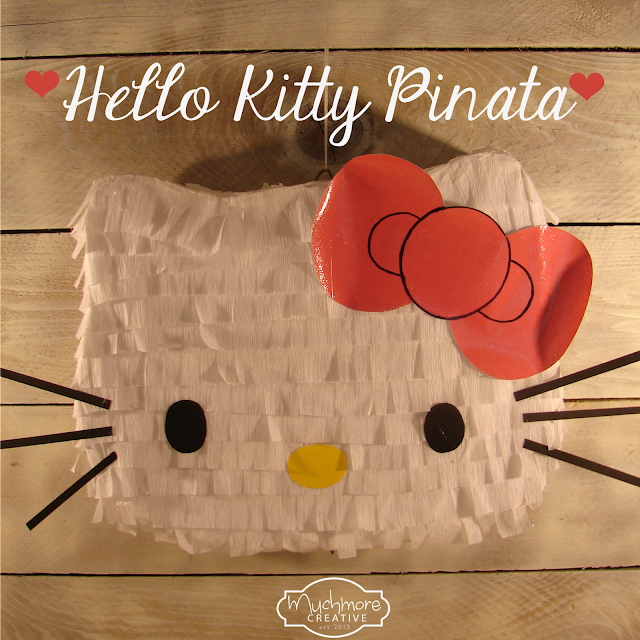
Hello Kitty Pinanta

My daughter wants a Hello Kitty themed party for her birthday,  so I decided to get started on the decorations.  We have a tradition in our family that the kids get a pinata for their birthday party, so a Hello Kitty pinata is the project!

HK Pinata


I started out with a small hello kitty pattern that I enlarged on a copier to the size that I wanted the pinata to be.


Then trace the pattern twice on a heavy piece of cardboard.


Next, cut out the cardboard patterns.


Then cut some 3 inch strips of cardboard that will be used to go around the pattern


Use part of one of the cardboard strips to make a circle, triangle, or whatever shape you want.  You are going to glue this in the middle of the inside of the cardboard shape.  This makes the pinata sturdy, so when you add the wet paper mache, the pinata will not become concave when it drys.


Next, glue the cardboard strips around the outside of the pattern, leaving a 2 - 3 inch gap in the perimeter so you have a place to put in the candy!


This is what the pinata will look like before you add the paper mache.


Now for the fun part - goooooooey paper mache.

First take some newspaper and rip it into 2 - 3 inch strips.


Now it is time to mix the paper mache paste.


This is what you will need:
Flour
Water
Cinnamon (optional)

Mix the water and flour together in a 2 to 1 ratio.  For example, mix 1 cup flour with 2 cups water.  I use warm water because I like it better.  I also add a little bit of cinnamon to the mix.  I do not like the smell of the water and flour mix  -  cinnamon makes is so much more pleasant!
I use my cheap project mixer to mix the lumps out.


Next, dip the newspaper strips in the paste and run it through your fingers to get most of the excess paste off.


Then lay the paper strips on the pinata.


This is what it looks like when you finish.
You will need to let it dry overnight.
.


I usually do a couple layers of newspaper and then add a layer of printer or construction paper that is the same color that I will paint the pinata.  You can see the cinnamon now, put you won't see it after it is painted.


Then, paint the pinata.


Next, cut 3/4 inch slits about 1/2 inch apart on a streamer.  Then, wrap the streamer around the pinata and glue it down.


Next, make the eyes, nose, whiskers, and bow for Hello Kitty.


Lastly, glue on the eyes, nose, whiskers and bow!


I hope my daughter will love it!


I have made several pinatas for my kids birthdays over the years.  You can make them any theme you want and they turn out really neat and the kids love them!  Here are a few:


What type of pinata would you make?

Thanks so much for stopping by!

post signature
Be sure to check out these fun link up parties!
Found & Foraged Link Party
DIY Sunday Showcase
Mad Skills
Inspire Me Monday
Show and Tell Link Party
Lou Lou Girls Fabulous Party
Create, Link, Inspire
Tutorials & Tips Link Party
Creative Muster
Share Your Cup
Lovely Little Link Party
Flaunt It Friday
Link Party Palooza
Much Ado About Monday

Saturday, August 8, 2015

Rustic Utensil Holder

I have been looking for a fun utensil holder for when we have BBQ's or friends and family over for a fun meal.

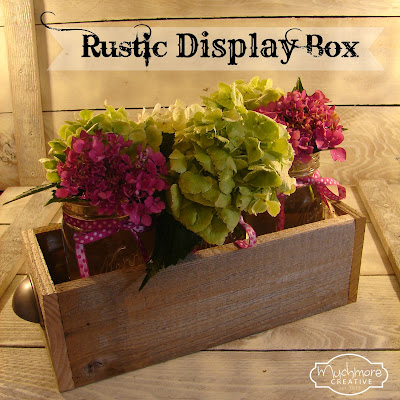
Display box


I decided I wanted to use some old cedar fence boards to make the box.
Measurements I used:
3 boards @ 4.5" x 13" - for the sides & bottom
2 boards @ 4.5" x 5 3/8. - for the ends


We used a table saw to cut the boards so they were smooth cuts.


My hubby helped by using his pocket hole jig to put it together.


I had some burlap tags that I thought would look good on it, so I free handed some utensil drawings using a chalk pen


I used some bakers twine to tie the tags on some quart mason jars.


I added some fun hardware to the box.


Lastly, I put in the utensils & it's all finished!


It also looks pretty as a display box!

Rustic Centerpiece

What would you put in your box?


Thanks for stopping by!
post signature

Be sure to check out these fun link up parties!

DIY Sunday Showcase
Found & Foraged Link Party
Mad Skills
Show & Tell Link Party
Tutorials & Tips Link Party
Create, Link, Inspire
Lou Lou Girls Fabulous Party
Creative Muster
Work It Wednesday
Share Your Cup
The Wednesday Round Up
Link Party Palooza
Flaunt It Friday