Sunday, January 31, 2016

Valentine Tags

Valentine's Day is approaching fast, and I wanted to make something new this year.  I had a wood pallet that I wanted to use, and I had a fun project in mind!


First, cut the boards from the wood pallet to the length you prefer.  


Next, my handy husband cut the pieces of pallet into tags.  The large tag is about 12 inches high, the medium is about 10 inches high and the small tag is about 8 inches high.  They are all 6 inches wide.


Then, I painted the tags.


Next, I sanded them a bit to rough them up.


Then, I used my cricut to cut the patterns, but a cricut is not required, any stencil will work for this.


Next, stick the stencils to the boards and paint.


Then, when it is dry peal of the stencil.  I added a clear faux glaze to my boards - it has been raining here lately, so I didn't want to take them outside to spray them.


Lastly, thread the rope thru and tie it.


Thanks so much for stopping by!
post signature
Be sure to visit these fun link up parties!
Mad Skills
Show & Tell Link Party
Lou Lou Girls Fabulous Party
Inspire Me Monday
Share Your Cup
Flaunt It Friday
Link Party Palooza
Something To Talk About

Saturday, January 23, 2016

Valentine Chalkboard

Chalkboards are a favorite of mine - so I just had to make one for Valentine's Day this year!


The first thing I did was paint the frame and cut some MDF chalkboard to put in the frame.  HERE is a tutorial on how I make my chalkboard frames.


Next, I designed the chalkboard art.


I have another tutorial on how I make my chalkboard art HERE if you are interested!


Thanks so much for stopping by!
post signature
Be sure to stop by these fun link up parties!

Something to Talk About
Mad Skills
Link Party Palooza
Inspire Me Monday
Show & Tell Link Party
Create, Link, Inspire
Flaunt It Friday
Lou Lou Girls Fabulous Party
Share Your Cup

Sunday, January 17, 2016

Cabinet Door Frames

I have yearly pictures of the kids taken and I wanted a different way to hang them other than regular glass frames, so this is what I came up with!


I started out with some wood cabinet doors that I had purchased at the local Habitat for Humanity store.


I first painted them a silvery gray color.


Next, I sprayed them with Rustoleum's Heirloom White. 


After it had dried, I sanded them a bit so the silver color came through.  


Next, I made some labels for them.  


I used the metal label as a template so I knew what size to make their names.


Then I drilled holes for the screws and attached the metal labels.


I used some E6000 to attach the bull clips to the frames.


This is how it turned out before adding the picture.


They look cute with the kids pictures!


Thanks for stopping by!
post signature

Be sure to stop by these fun link up parties!

Mad Skills
Show & Tell Link Party
Lou Lou Girls Fabulous Party
Create, Link, Inspire
Inspire Me Monday
Flaunt It Friday
Link Party Palooza
DIY Sunday Showcase
Share It One More Time

Saturday, January 9, 2016

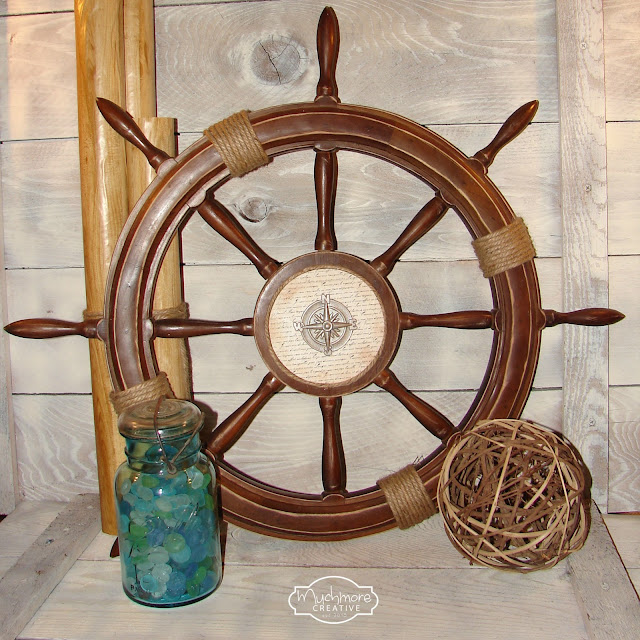
Ship Helm

I found this awesome ship helm when I was out thrifting.  I just knew I had to do something with it.

Helm


It started out like this...


I did some sanding.


Added some twine / rope.


I decided I wanted to add something to the middle.  So, I grabbed an old CD and traced it onto some script scrapbook paper.


I inked the edges of the scrapbook paper.


I modge podged the paper onto the CD.


I did some painting and inking on the compass center piece.


I glued the different parts together.


And this is how it turned out!


What do you think?

Are you working on any fun projects!


Thanks so much for stopping by!
post signature

Be sure to check out these fun link up parties!

Inspire Me Monday
Show & Tell Link Party
LouLou Girls Fabulous Party
Tutorials & Tips Link Party
The Wednesday Round Up
Share Your Cup
Link Party Palooza
Celebrate It Block Party
Share It One More Time
DIY Sunday Showcase